When it comes to mountain biking, ensuring that your child’s bike is properly fitted and adjusted is essential for their comfort, safety, and overall riding experience. A well-fitted mountain bike not only promotes efficient pedaling and optimal control but also reduces the risk of injury. With a few simple adjustments, you can ensure that your child’s mountain bike is customized to their specific needs and proportions.
In this guide, we will provide you with 10 detailed tips to help you fit and adjust your child’s mountain bike correctly. From selecting the right bike size to adjusting saddle height, handlebar position, and more, these tips will help you create a comfortable and safe riding environment for your young mountain biker. Whether your child is a beginner or an experienced rider, these tips will enable them to enjoy their mountain biking adventures to the fullest. So let’s dive into the details and learn how to properly fit and adjust a mountain bike for your child.
1. Choose the right mountain bike size
Selecting the correct bike size is crucial for your child’s comfort and safety. Refer to the manufacturer’s size guide, which usually provides recommendations based on your child’s height and inseam measurement. Have your child stand over the bike’s top tube with their feet flat on the ground. There should be a couple of inches of clearance between the top tube and your child’s inseam to ensure they can get on and off the bike easily.
2. Adjust saddle height
The saddle height affects your child’s pedaling efficiency and comfort. Start by having your child sit on the bike with their feet on the pedals. Adjust the saddle height so that their leg is almost fully extended with a slight bend at the knee when the pedal is at the lowest position. This position optimizes power transfer and prevents strain on the knee joint. Make sure the saddle is securely tightened once adjusted.
3. Set handlebar height
The handlebar height plays a crucial role in your child’s riding comfort and control. It should be set at a level that allows them to maintain a relaxed riding posture without putting excessive strain on their back, neck, or arms. If the handlebars are too high, it may affect steering control, and if they are too low, it may cause discomfort. Adjust the stem or spacers below the stem to achieve the desired handlebar height.
4. Check reach to handlebars
The distance between the saddle and handlebars, known as the reach, should be appropriate for your child’s arm length. They should be able to comfortably reach the handlebars without overstretching or feeling cramped. This ensures optimal control and maneuverability. If needed, you can adjust the stem length to fine-tune the reach.
5. Position brake levers
Properly positioned brake levers are essential for your child’s safety and control. Adjust the brake lever reach so that your child can easily reach and operate them with their hands on the handlebars. They should be able to comfortably engage the brakes without having to strain or reposition their hands. Most brake levers have reach adjustment screws that allow you to customize the lever position.
6. Align foot position
Correct foot position on the pedals promotes efficient pedaling and stability. Instruct your child to place the balls of their feet over the pedal axle. This ensures a good balance between power transfer and control. The foot should not be too far forward or too far back on the pedal.
7. Adjust gear shifting
Familiarize your child with the gear shifting mechanism of the mountain bike. Teach them how to operate the gear shifters and derailleurs. Ensure that the gear levers are positioned comfortably within reach. If the shifting feels too stiff or too loose, you can adjust the cable tension using barrel adjusters on the derailleurs or shifters. Encourage your child to practice shifting gears and ensure smooth and precise gear changes.
8. Check suspension settings
If your child’s mountain bike has suspension, it’s important to set it up correctly for their weight and riding style. Refer to the manufacturer’s guidelines for the recommended suspension sag. Suspension sag refers to the amount of travel the suspension compresses when your child is sitting on the bike. Adjust the suspension preload or air pressure according to the guidelines to achieve the recommended sag. This ensures optimal comfort, traction, and control over rough terrain.
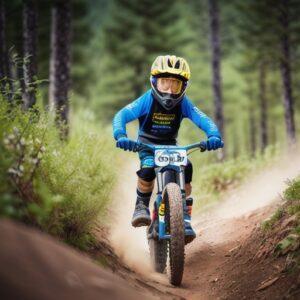
9. Ensure proper helmet fit
Wearing a well-fitting helmet is crucial for your child’s safety. Choose a helmet that meets the appropriate safety standards and fits your child’s head size. When your child wears the helmet, it should sit level on their head, covering their forehead without obstructing their vision. The helmet straps should form a V-shape under their ears, with the chin strap comfortably snug. Make sure to adjust the straps and buckle for a secure fit.
10. Regularly reassess and make adjustments
Children grow quickly, so it’s important to regularly reassess and make necessary adjustments to their bike fit. Check the bike’s fit every few months or whenever your child complains of discomfort or difficulty riding. Adjust the saddle height, handlebar height, reach, and any other components as needed to ensure their comfort, safety, and optimal performance.
By following these detailed tips, you can ensure that your child’s mountain bike is properly fitted and adjusted, providing them with a comfortable and safe riding experience.